
How to configure username password authentication in Spring Security
Continuing my previous article configuring CSRF with Spring Security, this time we are going to configure the authentication. Spring security provides all the required components needed for authentication. We can specify which URLs are only accessible by authenticated users, which URLs are freely accessible by anyone, in the SecurityFilterChain.
By specifying the request matcher to be authenticated in the SecurityFilterChain, access to the URLs listed in the request matcher will automatically be redirected to the user login page if the user is not logged in. In the example below, the authorizeHttpRequests() allows us to configure the authorization. The first configuration .requestMatchers("/api/v1/users/registerUser").permitAll() allows anyone, logged in or not, to access the specific url “/api/v1/users/registerUser”. The next anyRequest().authenticated() specifies all other requests for pages not matched by the first request matcher, are only accessible by authenticated users.
@Bean
@Configuration
@EnableWebSecurity
public class ForumSecurityConfiguration {

    @Bean
    public SecurityFilterChain filterChain(HttpSecurity httpSecurity) throws Exception{
        httpSecurity.authorizeHttpRequests()
                .requestMatchers("/api/v1/users/registerUser").permitAll()
                .anyRequest().authenticated()
                .and()
                .formLogin()
                .and()
                .logout()
                .and()
                .cors()
                .and()
                .csrf()
                .csrfTokenRepository(CookieCsrfTokenRepository.withHttpOnlyFalse())
                .csrfTokenRequestHandler(new CsrfTokenRequestAttributeHandler());
        return httpSecurity.build();
    }

    @Bean
    public PasswordEncoder passwordEncoder(){
        return new BCryptPasswordEncoder();
    }

}
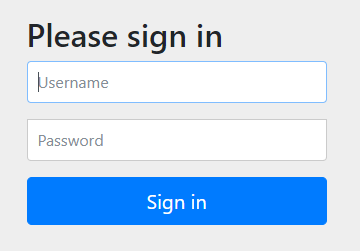
With the formLogin() and formLogout(), Spring Security automatically provides a login and logout page for us. Neat!
So for example, if we access our swagger page - http://localhost:8080/swagger-ui.html, we will be redirected to the login page instead.
The function for the PasswordEncoder bean is to specify that we will be using BCrypt password hashing function to hash our passwords.
Next, we need to create the part to set up the authentication by username and password. Except that it is already provided by Spring Security! We just need to set up the database storage for the users and roles. Spring security by itself provides different authentication methods, including LDAP, OAuth2, SAML, as well as the traditional username and password, which we are going to implement today.
To start, we can first create the model objects for our Users and Roles in our application.
@NoArgsConstructor
@RequiredArgsConstructor
@AllArgsConstructor
@Data
@Entity
@Table(name = "FORUM_USER")
public class ForumUser {
    @Id
    @NonNull
    @Column(name = "USER_ID")
    String userId;

    @NonNull
    @Column(name = "GIVEN_NAME")
    String givenName;

    @NonNull
    @Column(name = "FAMILY_NAME")
    String familyName;

    @NonNull
    @Column(name = "EMAIL", unique = true)
    String email;

    @NonNull
    @Column(name = "PASSWORD")
    String password;

    @NonNull
    @Column(name = "ENABLED")
    Boolean enabled;

    @NonNull
    @Column(name = "LOCKED")
    Boolean locked;

    @CreationTimestamp
    @Column(name = "CREATED", nullable = false, updatable = false)
    LocalDateTime created;

    @UpdateTimestamp
    @Column(name = "UPDATED", nullable = false)
    LocalDateTime updated;

    @ManyToMany(fetch = FetchType.EAGER)
    @JoinTable(name = "USERS_ROLES", joinColumns = @JoinColumn(name = "USER_ID", referencedColumnName = "USER_ID"), inverseJoinColumns = @JoinColumn(name = "ROLE_ID", referencedColumnName = "ROLE_ID"))
    Collection<ForumRole> roles;

    public ForumUser(@NonNull String userId, @NonNull String givenName, @NonNull String familyName, @NonNull String email, @NonNull String password){
        this.userId = userId;
        this.givenName = givenName;
        this.familyName = familyName;
        this.email = email;
        this.password = password;
        this.enabled = true;
        this.locked = false;
        this.created = LocalDateTime.now();
        this.updated = LocalDateTime.now();
    }
}
@NoArgsConstructor
@RequiredArgsConstructor
@AllArgsConstructor
@Entity
@Data
@Table(name = "FORUM_ROLE")
public class ForumRole {

    @Id
    @NonNull
    @Column(name = "ROLE_ID")
    String roleId;

    @NonNull
    @Column(name = "ROLE_NAME", unique = true)
    String name;

    @NonNull
    @Column(name = "VALID")
    Boolean valid;

    @CreationTimestamp
    @Column(name = "CREATED", nullable = false, updatable = false)
    LocalDateTime created;

    @UpdateTimestamp
    @Column(name = "UPDATED", nullable = false)
    LocalDateTime updated;

    @ManyToMany(mappedBy = "roles")
    Collection<ForumUser> users;

    public ForumRole(@NonNull String roleId, @NonNull String name){
        this.roleId = roleId;
        this.name = name;
        this.valid = true;
        this.created = LocalDateTime.now();
        this.updated = LocalDateTime.now();
    }
}
Note that in our application, we envisioned that each user can have multiple roles, and of course each role can be populated by multiple users, so it is a many to many relationship. So we have the @ManyToMany and @JoinTable annotations so that there is a new joint table created, with the fields USER_ID and ROLE_ID. Then as usual, we have to create the repository.
public interface ForumUserRepository extends JpaRepository<ForumUser, String> {
    boolean existsByEmail(String email);
}
public interface ForumRoleRepository extends JpaRepository<ForumRole, String> {
}
That is all we need for now.
When we specify the formLogin() in our SecurityFilterChain, we inherently specify to use UserNamePasswordAuthenticationFilter as the authentication method.
When the user login process is triggered, the authentication provider will trigger the UserDetailsService to load the UserDetails by the user name. UserDetails is the user object recognized in Spring Security. In order to get the user objects from our database which we have just defined, we will need to provide a bean that implements the UserDetailsService, and overwrite the loadUserByUserName method to get the UserDetails from our database.
@Service
@Transactional
public class ForumUserDetailsService implements UserDetailsService {

    ForumUserRepository repository;
    public ForumUserDetailsService(ForumUserRepository repository){
        this.repository = repository;
    }

    @Override
    public UserDetails loadUserByUsername(String userId) throws UsernameNotFoundException {
        ForumUser user = repository.findById(userId)
                .orElseThrow(() -> new UsernameNotFoundException("User id " + userId + " not found"));

        return new User(
                user.getUserId(),
                user.getPassword(),
                user.getRoles()
                        .stream()
                        .map(it -> new SimpleGrantedAuthority(it.getName())).toList());
    }
}
So what we did here is to get the ForumUser from our repository, then convert it to a UserDetails object to return. Note that our role is named GrantedAuthority in Spring Security. I think it is easier to understand roles instead of Granted Authority. The Granted Authority just have a function named getAuthority() to return a string representing what is the authority, which we can also understand it as the role or even a permission to use a feature. The SimpleGrantedAuthority is just an implementation of the Granted Authority.
That’s it! The rest of the implementation of the user login process is all handled by Spring Security.
The only thing we need to do now is to create the initial roles and user, so that we can log in to our application. For that, we will create an Application Runner to create the roles and user when the application starts up. We will create 2 roles - Admin and User, and a default Administrator user. And to make it flexible for the id and names of the roles, as well as the id, email and password of the default administrator role, we will accept it from the configuration properties. To know more about getting external configuration in Spring, do refer to my previous article on external configurations.
So let’s first create the properties object we are going to receive
@ConfigurationProperties(prefix = "application.config")
@Getter
@Setter
public class ApplicationStartupConfig {
    String adminRoleId;
    String adminRoleName;
    String userRoleId;
    String userRoleName;
    String adminUserId;
    String adminUserEmail;
    String adminUserPassword;
}
Then we can add the following configurations in our application.properties file.
application.config.adminRoleId=ADMIN_ROLE
application.config.adminRoleName=Administrator
application.config.userRoleId=USER_ROLE
application.config.userRoleName=User
application.config.adminUserId=Admin
application.config.adminUserEmail=admin@forum.com
application.config.adminUserPassword=P@ssw0rd123
If we hardcode the password in our code instead of in the properties file, sonarqube will complain it as a security flaw
Then we create a bean of ApplicationStartupRunner, stereotyped as a Component, to create the roles and users with the values from our properties file.
@Component
public class ApplicationStartupRunner implements ApplicationRunner {

    ForumUserService userService;
    ForumRoleService roleService;
    PasswordEncoder passwordEncoder;
    ApplicationStartupConfig applicationStartupConfig;

    public ApplicationStartupRunner(ForumUserService userService, ForumRoleService roleService, PasswordEncoder passwordEncoder, ApplicationStartupConfig applicationStartupConfig){
        this.userService = userService;
        this.roleService = roleService;
        this.passwordEncoder = passwordEncoder;
        this.applicationStartupConfig = applicationStartupConfig;
    }

    @Override
    public void run(ApplicationArguments args) {
        ForumRole adminRole = new ForumRole(applicationStartupConfig.getAdminRoleId(), applicationStartupConfig.getAdminRoleName());
        roleService.create(adminRole);

        ForumRole userRole = new ForumRole(applicationStartupConfig.getUserRoleId(), applicationStartupConfig.getUserRoleName());
        roleService.create(userRole);

        ForumUser adminUser = new ForumUser(
                applicationStartupConfig.getAdminUserId(),
                "Administrator",
                "Forum",
                applicationStartupConfig.getAdminUserEmail(),
                passwordEncoder.encode(applicationStartupConfig.getAdminUserPassword())
        );
        userService.createAdmin(adminUser);
    }

}
Last but not least, we also created a ForumUserService and a ForumRoleService just to make it easier to create the roles and users.
We shouldn’t leave our code untested, but testing is easy. We just need to annotate our test methods with the @WithMockUser annotation to mock as an authenticated user, and @WithAnonymousUser to simulate visiting the page as a user who isn’t logged in. Be sure to add the annotations to all the past test classes else you’ll get a 403 forbidden error.
@ExtendWith(SpringExtension.class)
@AutoConfigureMockMvc
@SpringBootTest
public class AuthenticationTest {

    @Autowired
    MockMvc mockMvc;

    @Test
    @WithAnonymousUser
    void givenAnonymousUser_whenCallSwagger_thenRedirectToLogin() throws Exception {
        mockMvc.perform(get("/swagger-ui/index.html"))
                .andExpect(status().is3xxRedirection());
    }

    @Test
    @WithMockUser
    void givenUserLoggedIn_whenCallSwagger_thenOk() throws Exception {
        mockMvc.perform(get("/swagger-ui/index.html"))
                .andExpect(status().isOk());
    }

}
Finally, a working copy of the above implementations can be found at https://github.com/thecodinganalyst/forum/tree/spring-security-login.
This is part of a series illustrating how to build a backend Spring boot application.
- Getting Started Spring Boot Application
- Deploying to Docker
- Spring Data Testing
- Testing Services
- Unit Testing of Controller
- Integration Testing
- Code quality review with Sonarqube
- Configure Spring Security CSRF for testing on Swagger
- Configure Access Management in Spring Security
- Validate inputs in Spring Boot RestController