
Integrate code quality review with SonarQube
In today’s environment, when we are having tons of dependencies in our application project, as developers we need to take care not just of the business logic, but also the code quality. Code quality is a wide spectrum including security, reliability, maintainability, test coverage, performance, etc. It is hard to quantify where our code stands according to widely accepted standards, yet it is all the more important to know where we stand especially if it the project is running in the public domain, susceptible to external attacks as well as online reviews.
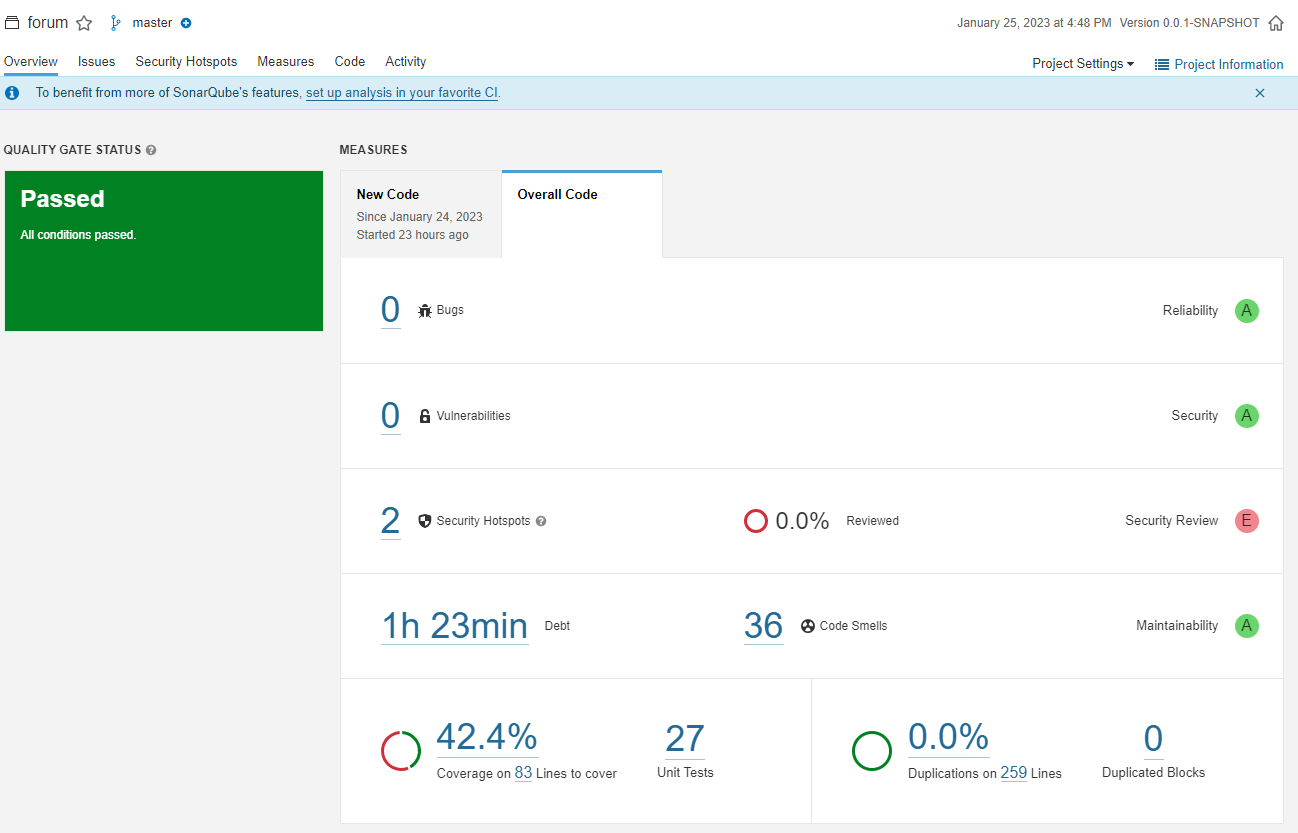
A good tool to use is SonarQube, which one can install it in your local computer and run an automated analysis on your code every time a code is committed. After scanning the code, Sonarqube provides a report of the analysis of your overall code, as well as the new codes commited. The overview shows the number of bugs, vulnerabilities, security hotspots, technical debt, code smells, etc.
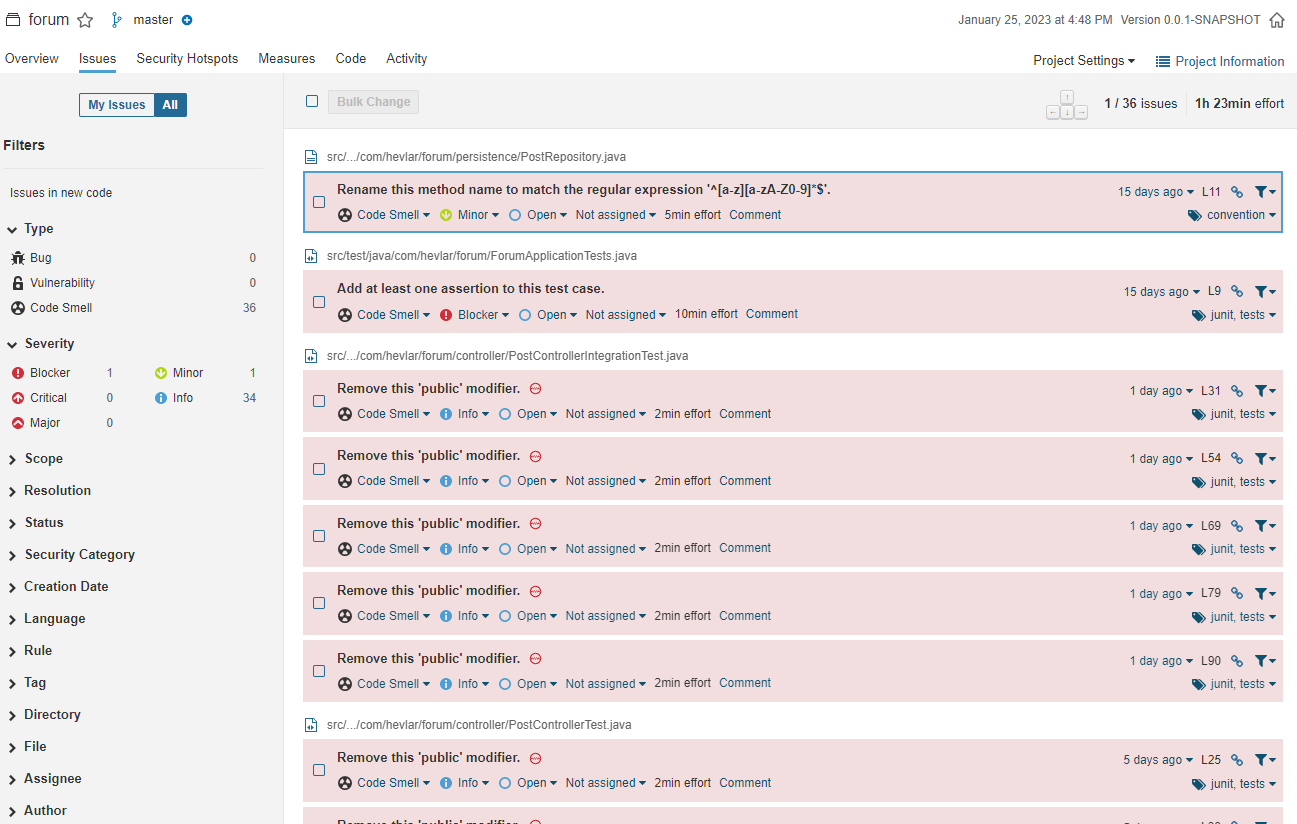
It pinpoints all the issues with your code, so that you can know where to change your code.
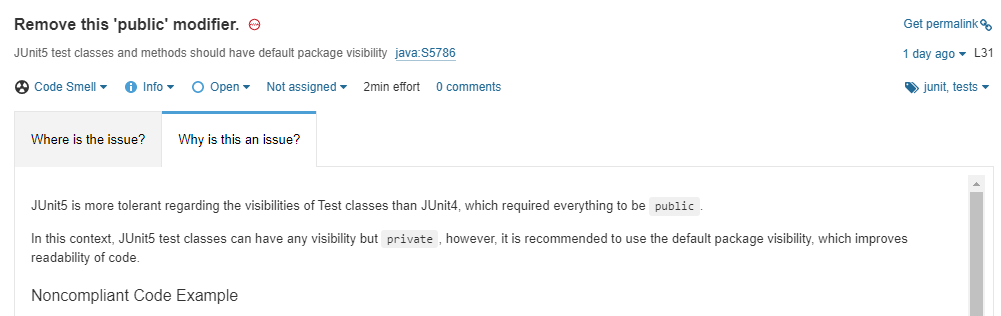
And it also explains why each issue is flagged out, and provides examples for non-compliant and compliant samples.
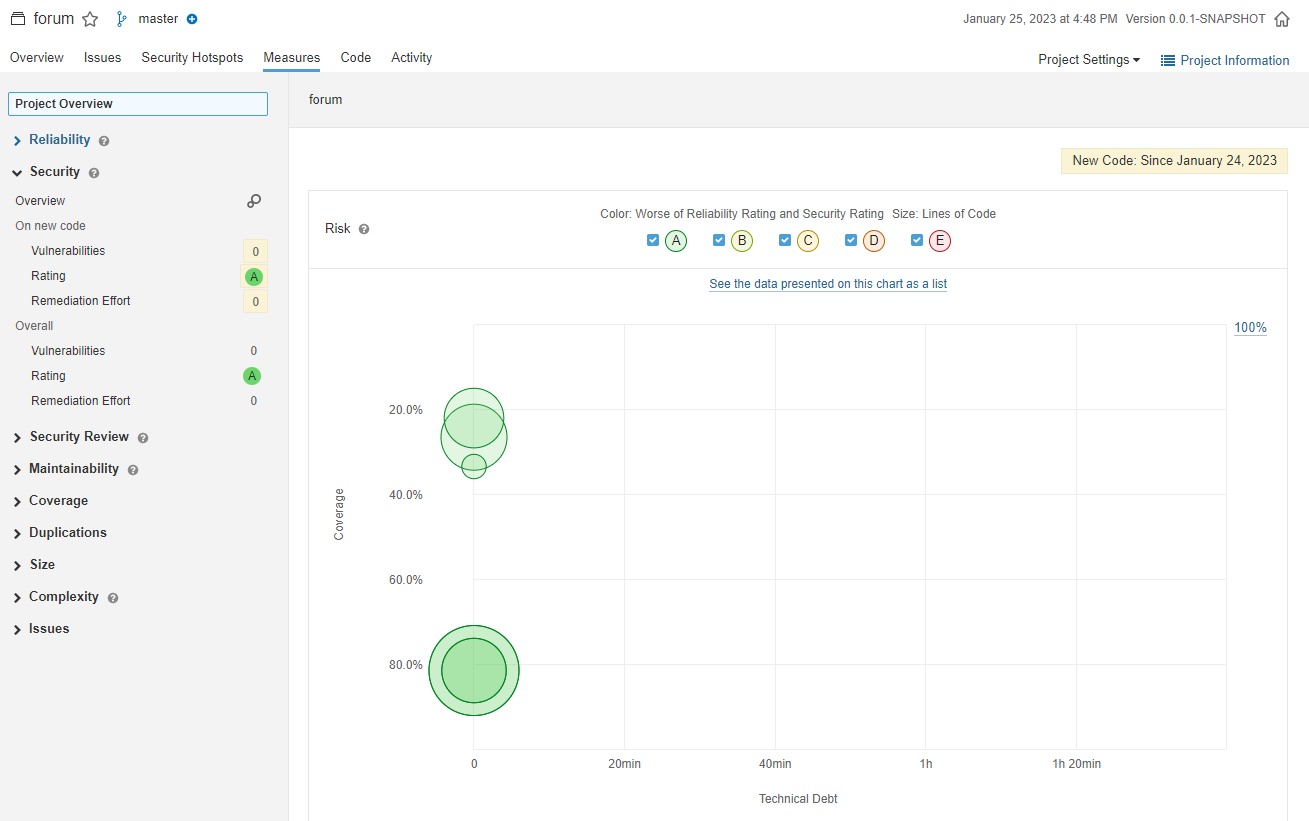
In terms of the different measures like reliability, security, maintainability, test coverage, it provides individual ratings for each measure to let you know where your code stands.
Integrating sonarqube into our application project is easy, and I shall demonstrate how to do that with the project in Spring boot application getting started.
First and foremost, we have to install Sonarqube. Rather than installing it in my local computer, I’d prefer to get it in a docker container. Following the steps in https://docs.sonarqube.org/9.6/try-out-sonarqube/, run the following command to install the official sonarqube docker image to port 9000.
docker run -d --name sonarqube -e SONAR_ES_BOOTSTRAP_CHECKS_DISABLE=true -p 9000:9000 sonarqube:latest
Then you can access the sonarqube application on http://localhost:9000/ in your local computer. Follow the steps in the link to setup a new project.
After setting up our project in sonarqube, we just need to update our build.gradle with the sonarqube and jacoco plugin. Although sonarqube supports the reporting of test coverage as part of the analysis, it does not generate the coverage report itself, hence a third-party tool is required to generate the coverage report, and Jacoco is supported. To know more about Jacoco and test coverage, do refer to Code coverage for Java - Jacoco.
plugins {
    id "org.sonarqube" version "3.5.0.2730"
    id "jacoco"
}
if the
pluginsclosure already exists, just add the 2 plugin lines in the existingpluginsclosure.
Then we add the following block in our build.gradle so that the jacocoTestReport task will run at the end of the test task. We also make the test task a dependency of the jacocoReport, and enable the xml report from jacoco so that the result can be fed to sonarqube.
test{
    finalizedBy jacocoTestReport
}

jacocoTestReport{
    dependsOn test
    reports {
        xml.enabled true
    }
}
Lastly, we add our project information as set up in sonarqube, to the properties of our sonarqube task.
sonarqube {
    properties {
        property "sonar.host.url", property('sonar.host.url')
        property "sonar.projectKey", property('sonar.project.key')
        property "sonar.login", property('sonar.login')
    }
}
We are using gradle project properties to supply the sonarqube credentials, so that we don’t have to check in the credentials in our git repository. A new gradle.properties file should be created in the project root folder with values like such.
sonar.project.key=Forum
sonar.host.url=http://localhost:9000
sonar.login=GET_YOUR_OWN_TOKEN_DURING_SONARQUBE_PROJECT_SETUP
Now all is set, you should be able to see the new jacocoTestReport and sonarqube tasks under the verification group in your IDE’s gradle plugin. Go ahead and run it, then open your sonarqube to view the code review results and improve your code.
A full example of this setup is available on my github repository in the initial-gradle tag of the forum project.
This is part of a series illustrating how to build a backend Spring boot application.
- Getting Started Spring Boot Application
- Deploying to Docker
- Spring Data Testing
- Testing Services
- Unit Testing of Controller
- Integration Testing
- Code quality review with Sonarqube
- Configure Spring Security CSRF for testing on Swagger
- Configure Access Management in Spring Security
- Validate inputs in Spring Boot RestController